
After building the kids' playground and fort, I felt like I could build anything! Since we moved into our house almost 9 years ago, we had done the landscaping in the backyard and hired a contractor to put in a patio. The back of our house faces west, so in the (HOT!!!!) summer here, the afternoon sun faces our house.

Though our windows are chemically treated like many in Las Vegas to keep out the heat, and we have solar blocking curtains inside to cover the sliding doors to the patio, every little bit of shade helps. I had been thinking that it would be nice to have a partial patio cover of some sort, that could be covered with vines to provide shade in the summer, and allow the sun to come through during the cooler winter. Then we went camping at San Clemente State Beach in southern California, and I found what I wanted to build right at our campground!

I liked it because it seemed like pretty simple, straightforward construction, involved materials that I could find at my local stores, and looked rustic. It would be a great structure to train vines on. So, with my hubby's encouragement, and a lot of photos of the San Clemente pergola and others I found online, I set to work.
I took a lot of photos of the pergola at San Clemente, so I would know what materials to use and how to connect everything. My biggest concern was building a safe structure that could withstand the desert winds and heat. How could I secure the pergola posts to our concrete patio? Was it even possible?
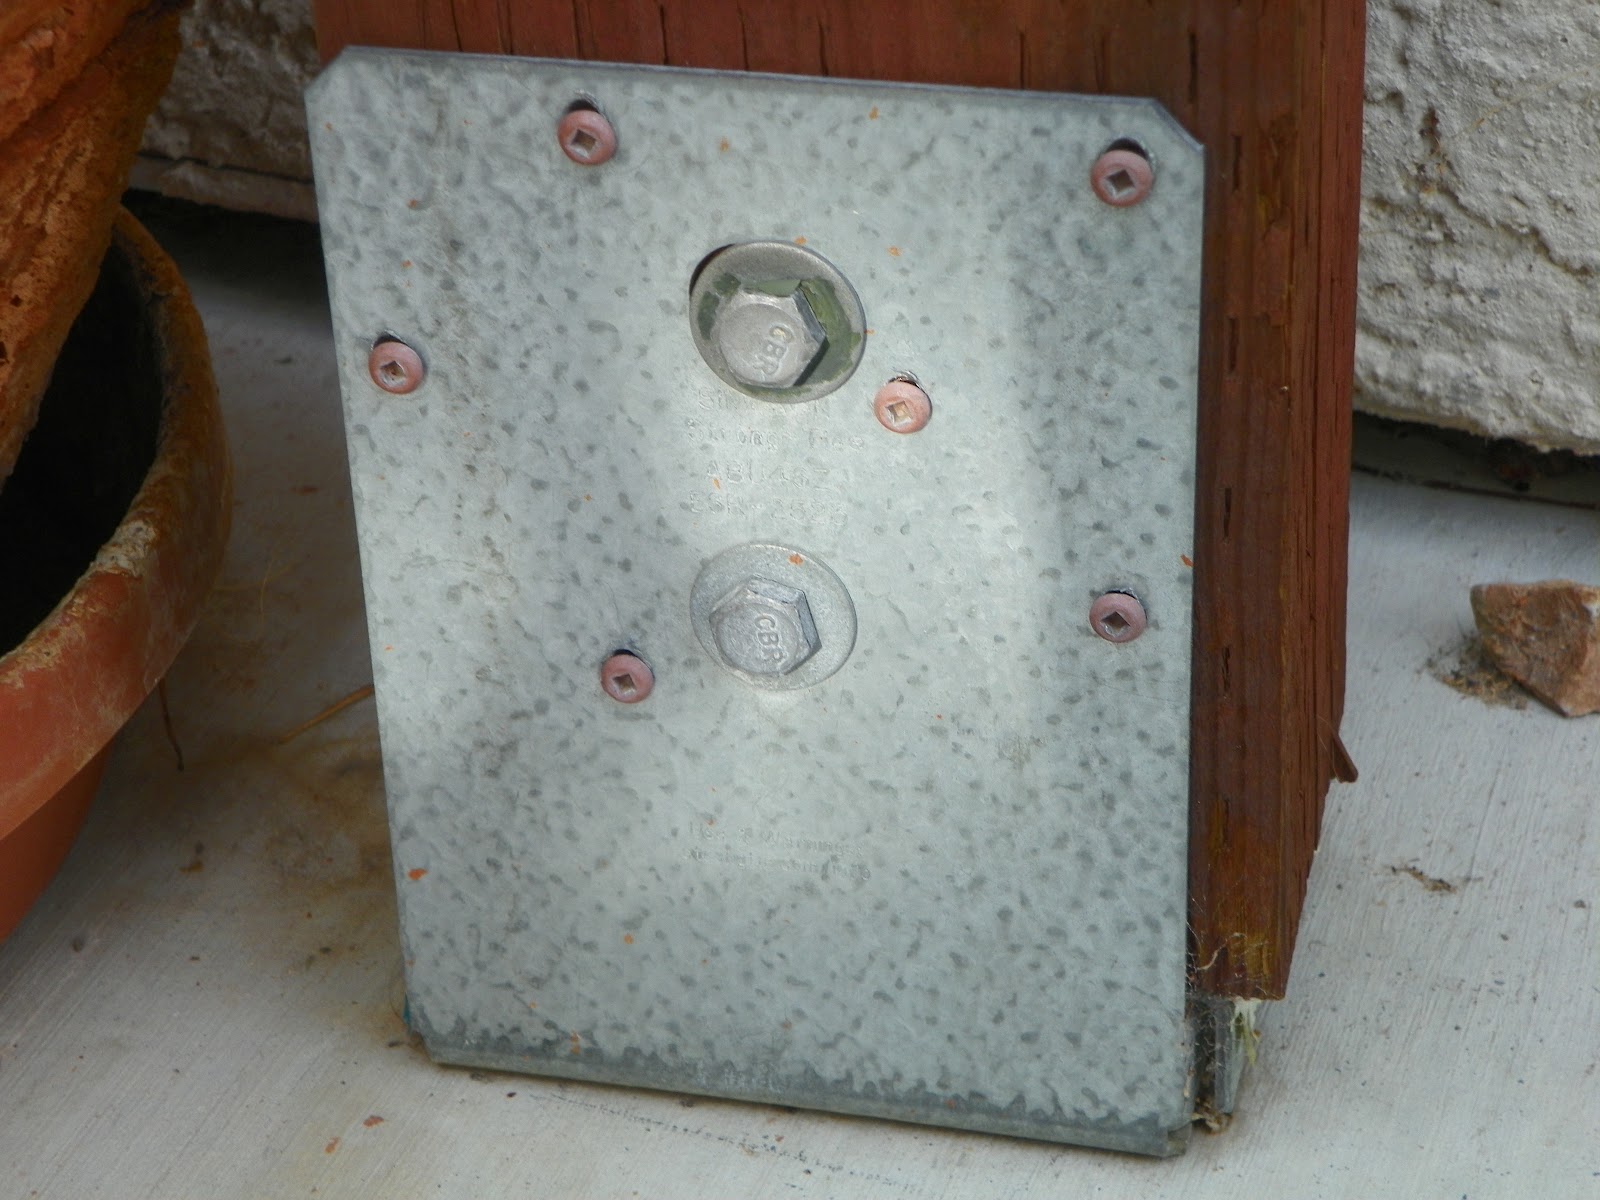 With some research, I found out that Simpson Strong-Tie makes some steel supports specifically designed to support vertical posts, and with wedge anchors, can be securely attached to existing concrete foundations. Here's what the post bases look like:
These can be bolted down onto a solid, existing concrete slab, and the posts connected to the base with screws or bolts. Getting them connected to the concrete was the biggest challenge for me. I highly recommend using or renting a hammer drill if you can. I did not have one, and wanted to try using my power drill with a large masonry drill bit, which I did. However, it took a LOT of patience to do it that way. I went through two drill bits, and it took me drilling on and off several hours over the course of 3 days to drill the holes deep enough to secure the wedge anchors. Here is what they look like:

Basically, you drill a hole into the concrete just wide enough and deep enough for the wedge anchor, drive it into the hole by tapping with a hammer, place the post base in place over the anchor, and tighten it down with the washer and nut. Then the pressure from the load it holds causes the wedge at the bottom to expand, holding the wedge anchor (and what is connected to it) securely in place.*

After the post brackets were in place, I put up and secured the posts to them. Then it was time to figure out what the top of the structure was going to look like. I laid out the pieces of pre-stained, pressure treated lumber on the patio, to visualize the shape and plan the space between the slats, and pre-drilled the pilot holes, so they would be easier to connect up high.
Next would come the fun part: putting it all together!
*Please note, I am not a professional builder or designer. Please be
familiar with your local building requirements and safety issues before
beginning your own building projects!
**You
are welcome to use my designs or improve upon them, I just request that
you send me a photo of your project when you are done!
No comments:
Post a Comment