Next, I put the "cabinets" in my bedroom against the wall where I wanted them, and measured to find out what size countertops I would need. I used two rectangular pieces of the same sanded plywood to make the countertop. The one sitting on the cabinet on the left side sits on the cabinet, and extends past it to the back wall. To give it more support in the back corner against the wall, I attached a sturdy 2x4 into the wall studs. Then I glued and screwed the countertops down onto the cabinet boxes. So that they wouldn't show later, I screwed them down in areas where I knew that the bookshelf units that would be covering the countertops.

After that, it was time to build the bookshelves on top of the cabinets. I started with the one on the left side, above the smaller cabinet unit. Again, I followed the basic design of the cabinet for constructing, except it was much taller, with a hollow middle to add 3 shelves later with shelf pins.
It took some thinking to figure out how to make the shelving meet in the corner. If I simply added another vertical piece to each end, and connected them, it would have been simpler, but I would have sacrificed the whole corner of storage space. So I decided to add a plywood piece to the corner of the back wall, and give the shelves some support that way so that the corners could remain open, shown below.
The next step was to add a level of bookshelves on top of the longer cabinet against the back wall. This one had an opening for a shelf on the left and the right, and an opening in the middle for a tv. To secure it to the wall, I screwed the furring strip on the back of the unit into studs in the wall.
On top of that unit, I added another rectangular unit on top of that, again with 3 openings, and screwed through the furring strips into studs in the wall. Then, I installed shelving throughout the bookshelf units.
I added trim frames to the faces of all the cabinets with 1x2 pine trim strips, and 1x3 inch trim around the top to connect it to the ceiling, all with finishing nails and glue. I also added trim to the edge of the countertops, and moulding all the way around the bottom of the unit to the carpet. Finally, I used caulking all around the unit in any spaces where there were gaps, and painted the entire unit the same color eggshell paint as the wall, and installed the cabinet doors and hardware.
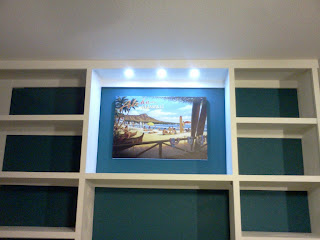
The last steps were to install puck lights above the space where the artwork would be displayed, and to install a power strip inside one of the cabinets for easy access for electrical cords.
The last steps were to install puck lights above the space where the artwork would be displayed, and to install a power strip inside one of the cabinets for easy access for electrical cords.
Above and at left, you can see the cords for the puck lights, tucked behind the cabinet frame and secured with cable ties to the cabinet. The light switch is at the bottom right of the photo.
At right, you can see where I drilled a hole through the inside of the cabinet so that there was a way to run a power cord through to the other side. Behind the fireplace, I screwed a power strip onto the side of the cabinet. Shown above, there is another hole drilled down through the countertop, from the space for the tv, to the power strip behind the fireplace.
Voila! We are very happy with our new bookshelves and entertainment unit, and it's exactly what I had envisioned for this space.


No comments:
Post a Comment